Introduction
For this project, I set up my own WireGuard VPN on the same VPS that hosts my e-portfolio website. Instead of paying for a third-party VPN, I wanted to learn hands-on how VPNs work, how to configure them, and how i would secure them when running alongside other services like WordPress.
Step 1: Provision the VPS
I used a DigitalOcean droplet with:
- Ubuntu 22.04 LTS
- $6/month plan (1 vCPU / 1 GB RAM)
- Closest region for latency
This was the same droplet as where my e-portfolio is hosted from

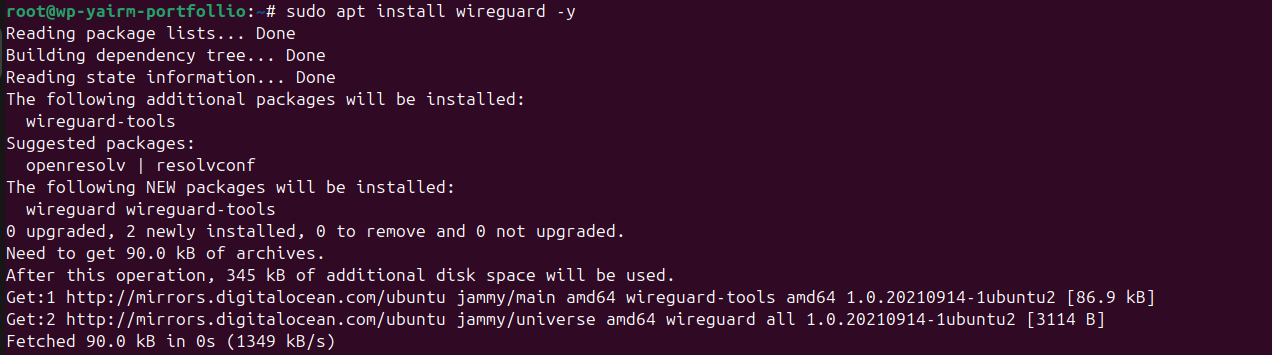
Step 2: Install WireGuard
After connecting to the server via SSH, I installed wireguard
Step 3: Generate Keys
Inside /etc/wireguard:


This gave me private/public key pairs for both server and client.

Step 4: Configure the Server
I created /etc/wireguard/wg0.conf:
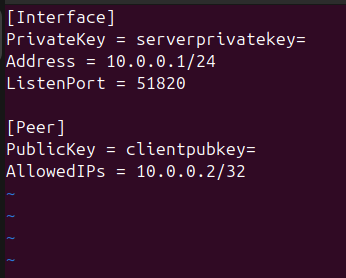
This gave the server a private VPN IP (10.0.0.1) and NAT’d client traffic out over eth0.
Step 5: NAT & Forwarding
To allow VPN clients to reach the internet through my VPS, I created a small bash script called postup.sh:

I saved it under /etc/wireguard/postup.sh, made it executable, and ran it:
chmod +x /etc/wireguard/postup.sh
./postup.sh
Step 6: Configure Clients
I set up multiple devices:
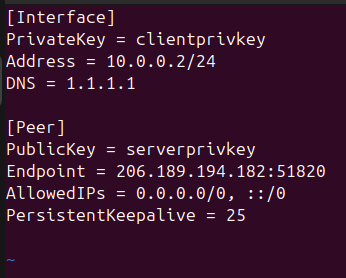
Linux Client:
Windows + Mobile:
- Used the WireGuard desktop/mobile apps.
- Imported configs or scanned QR codes.
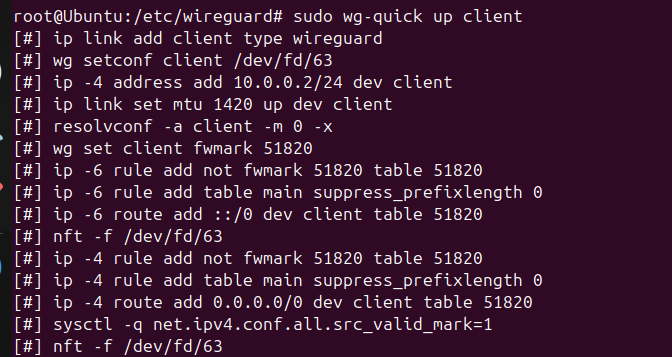
Step 7: Start the VPN
On the server:


On clients:
(or “Activate” in the WireGuard app).
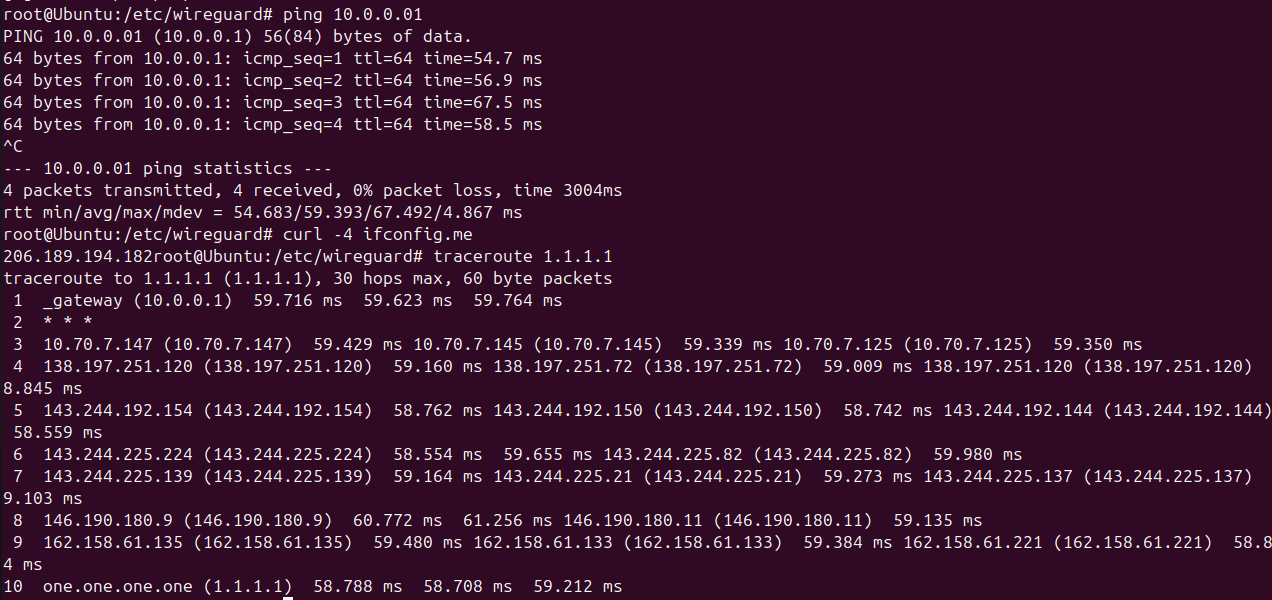
Step 7: Testing
I verified connectivity:
ping 10.0.0.1          # server VPN IP
curl -4 ifconfig.me    # showed server's public IP
traceroute 1.1.1.1     # first hop = 10.0.0.1
Debugging Challenges
This wasn’t smooth sailing and that’s where I learned the most:
- Issue:
wg-quick@wg0.servicefailed with “already exists.”
Fix: cleaned up interfaces withwg-quick down wg0; ip link del wg0. - Issue: Clients lost all internet when VPN was enabled.
Fix: enabled IP forwarding, corrected UFW rules, and fixed duplicate NAT rules.
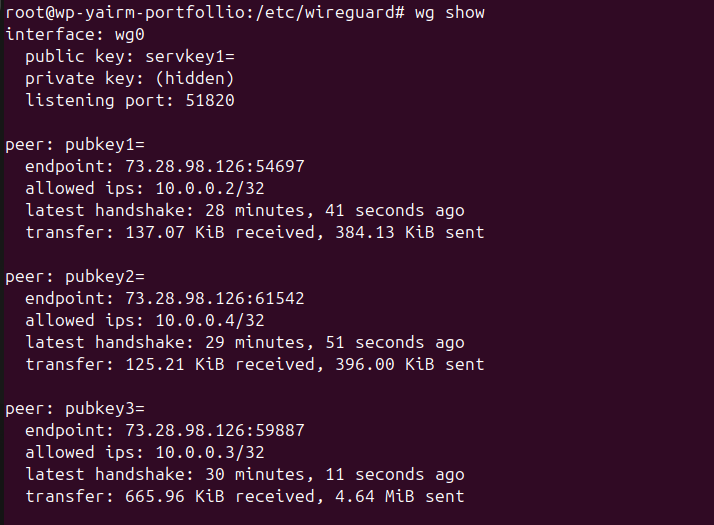
Debugging taught me to use the following commands to find my mistakes and debug them
wg show
journalctl -u wg-quick@wg0
iptables -t nat -L -n -v
Security Hardening
Running a VPN and WordPress on the same VPS introduces risk. If I were to keep it heres how i would address it:
- Firewall (UFW): only allowing ports 22 (SSH), 80/443 (web), 51820/udp (VPN).
- Fail2Ban: blocking repeated brute-force SSH attempts.
- SSH hardening: disabled password login → key-only access.
- WordPress security: updated themes/plugins, removed unused components, enforced strong credentials.
- VPN monitoring: regularly checking peers with
wg show.
Once This post is up the The VPN will no longer be running on the VPS
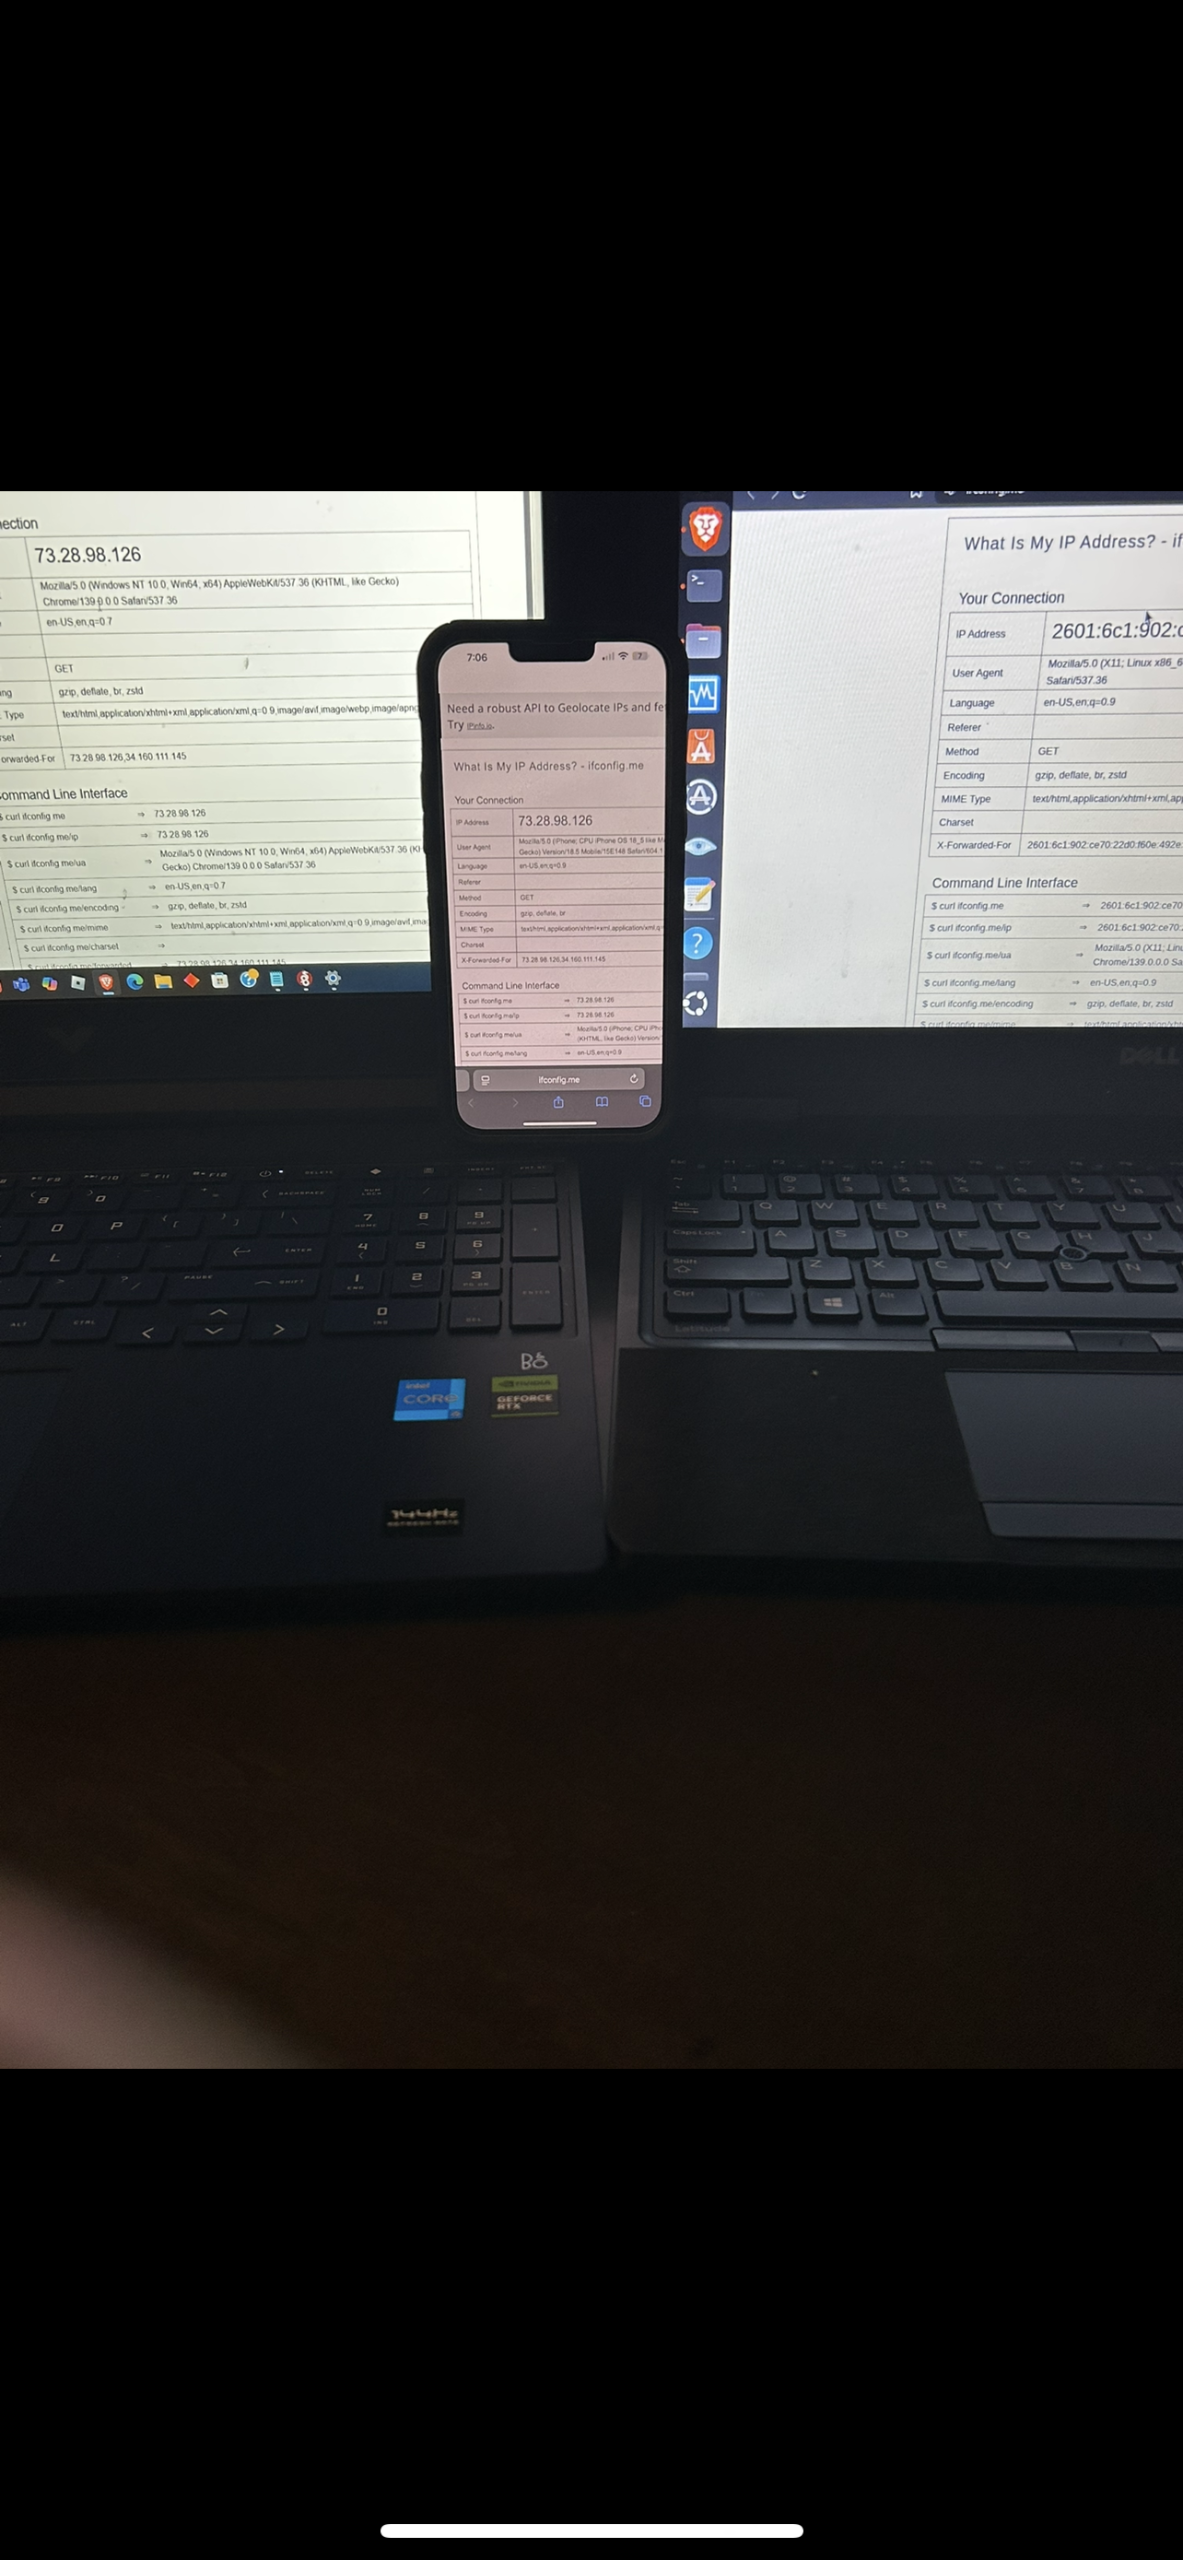
Step 8: Multi-Device Connectivity
- Ubuntu laptop
- Windows laptop
- Mobile phone
To demonstrate real-world use, I connected:
All routed traffic through the VPN server and shared its public IP. Seeing three peers in wg show with active handshakes and transfer stats was proof of success.
When Configuring on Windows and on my Phone I ran into issues with mistypes stalling my speed in getting it up

Reinforced Learning In
- Networking: private subnets, NAT, routing.
- Linux administration: systemd, UFW, iptables.
- Security: adding services expands the attack surface, mitigation matters.
- Cross-platform practice: configuring VPN clients across Linux, Windows, and mobile.
Final Thoughts
This project gave me a working, multi-device WireGuard VPN and strengthened my understanding of networking and system security.
This was further reinforcement me that real-world projects are not just about making something work they’re about debugging issues and thinking critically about the risks introduced.
With this VPN, I now have a fast, private, and secure connection I can use on the go and a solid project I can share with you the Reader. Thanks for reading. 🙂